![FMG_Logo_RGB_Small_Blk-1.png]](https://help.fmgsuite.com/hs-fs/hubfs/FMG_Logo_RGB_Small_Blk-1.png?width=75&height=49&name=FMG_Logo_RGB_Small_Blk-1.png)
Our New Email Builder is a modern, drag-and-drop email builder that gives you more flexibility to create custom emails that match your brand. This article covers everything you need to know to get started.
🔔 This is a beta release. At this time, the New Email Builder is only available to certain users with access, but will eventually replace our classic email builder.
Accessing the New Email Builder [BETA]
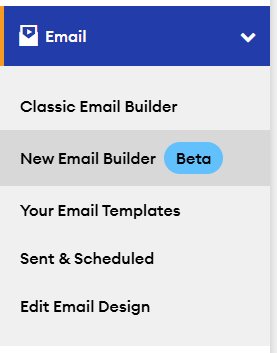
If your program has access to the New Email Builder, you will see two options in the Email section of your left navigation:
- Classic Email Builder: the original email builder, available for custom emails and all Content Library emails
- New Email Builder [Beta]: the new drag-and-drop builder, available for new custom emails
Click New Email Builder [Beta] to open the new builder.
Creating a Custom Email
Step 1: Add a subject line
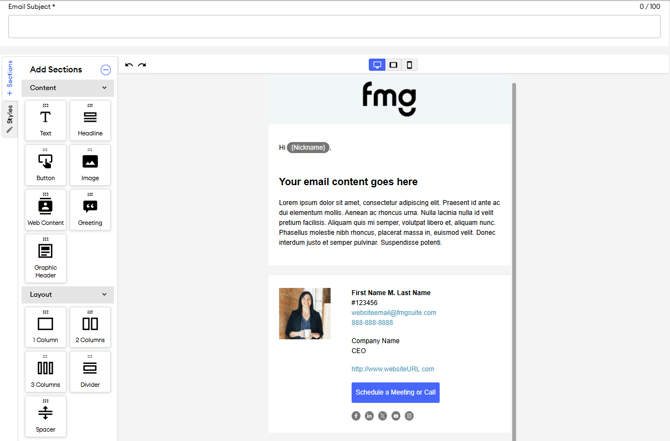
At the top of the builder, enter your Email Subject. This field is required before you can schedule or send your email.
Step 2: Build your email content
The left panel contains two sections: Content and Layout.
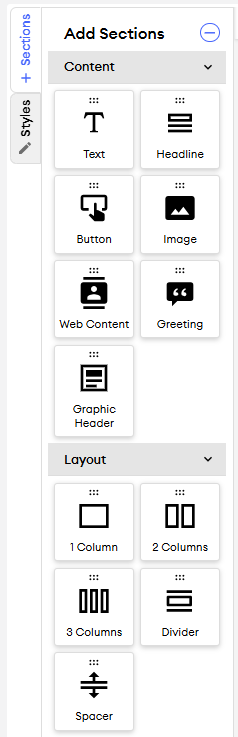
To build your email, drag components from the left panel onto the email body and drop them where you'd like them to appear. Click any element in the email body to edit its content.
Layout Sections
-
Add Layout Sections: Under the Layout section in the left panel, you can add column structure for your email:
- 1 Column: full-width single column layout
- 2 Columns: side-by-side two-column layout
- 3 Columns: three-column layout
- Spacer: add vertical spacing between sections
- Divider: insert a horizontal line to separate sections
- Drag a layout option onto the email body, and then you can add Content sections inside each column.
Content Sections
Simple Content Sections currently available:
|
Content Section |
Description |
| Text |
Add a block of formatted text; can be used for H2 & H3 header sections; click on the text to edit |
| Headline |
Add an H1 headline section; click on the text to edit |
| Image |
Insert an image; hover over the section, and select Replace Image to upload your image |
|
Greeting |
Insert a greeting; hover over it, and select Edit Greeting to change the style |
|
Button |
Add a clickable call-to-action button; hover over the section, and select Edit Button to change the URL/text |
|
Graphic Header |
Add your Profile > Logo or email design header image to the email. |
| Web Content |
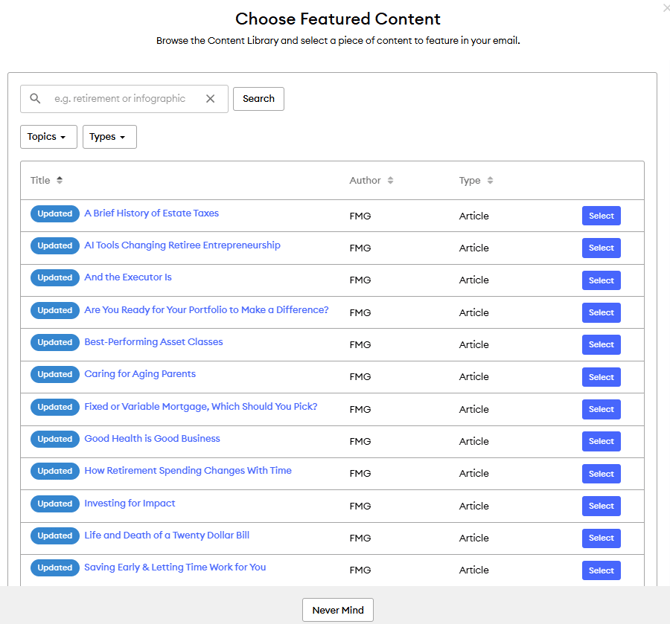
Drag and drop this section anywhere in your email, then select the Web Content article, infographic, quiz, or video you want to add to your email. You can search by content name or filter by topic and type. You can also edit the text and image for the Web Content section. |
Adding and Editing Sections:
- Find the content section you want in the left panel.
- Drag it into the email body and drop it where you'd like it to appear.
- Click the section in the email body to edit its content.
Reordering and Removing Sections
- To reorder sections: Click and drag any section in the email body to move it to a new position.
- To remove a section: Click the component in the email body and select the delete option.
Step 3: Style your content
To edit the styling of any section, click it in the email body to select it, then click the Styles tab in the left navigation panel to open the styles editor.
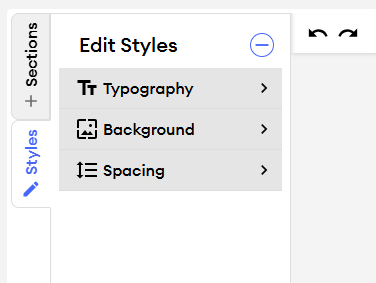
The Styles editor gives you control over:
|
Option |
What it does |
Content Sections Supported |
|
Typography |
Choose the font family for a selected section |
All sections that include text |
|
Sizing |
Set the width and height of the selected element |
|
|
Spacing |
Adjust padding and margins around the element |
|
|
Background |
Set a background color or image for the element |
|
|
Border |
Adjust the border width, style, color, and radius |
|
Style changes apply only to the selected section. To style a different section, click it in the email body, and the Styles editor will update to reflect that element's settings.
💡You can style individual columns within a layout independently. Click directly inside the column you want to edit before opening the Styles editor.
Editing Text Sections
When you click into any text element, an inline toolbar appears directly above it.
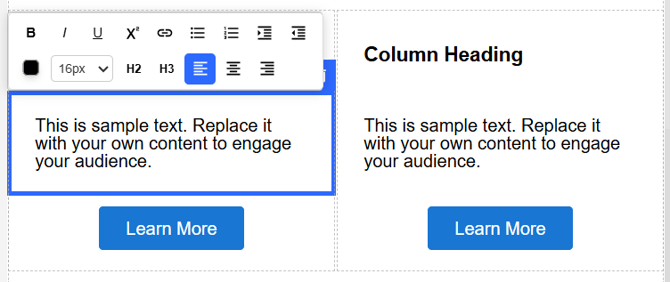
Use it to:
- Apply bold, italic, underline, or superscript formatting
- Add a hyperlink
- Create a bulleted or numbered list
- Adjust indentation
- Adjust font color and size
- Apply heading styles (H2, H3)
- Set text alignment (left, center, right)
To adjust font settings (such as font family) beyond the inline toolbar, select the text element and open the Styles editor tab.
Step 4: Select your signature
At the bottom of the email body, you will see your signature preview with a Personal and Business tab. Click the tab to switch between your personal and business signature. Your selection will be reflected in the preview immediately.
Step 5: Review your email
To preview how your email will look across devices, use the device toggle icons in the toolbar at the top of the email body:
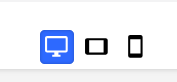
- Desktop
- Tablet
- Mobile
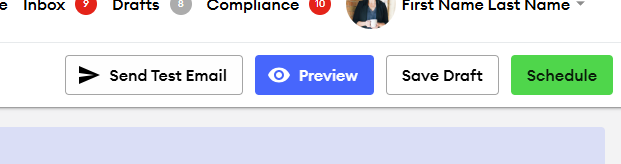
To see a full preview of how the email will appear for recipients, click Preview in the top right corner.
Step 6: Schedule or send
When your email is ready, click Schedule in the top right corner to proceed through the scheduling wizard. The send, schedule, and compliance submission steps work the same as they do in the Classic Email Builder.
The Classic Email Builder
The Classic Email Builder is still available and is not going away at this time. It is the only option for opening and editing emails from the Content Library, as well as for users whose program does not yet have access to the New Email Builder [Beta].
Click here to learn more about using the classic email builder.
Frequently Asked Questions
Can I open my existing emails or Content Library emails in the new builder?
Not yet. All existing emails, including Content Library emails, were created in the Classic Email Builder and will continue to open there. A future update will migrate existing emails to the new builder.
Will I lose access to the Classic Email Builder?
Not anytime soon. The Classic Email Builder will remain available until all existing email content has been migrated to the new builder in a future version of the rollout. Then, we will retire the Classic Builder.
Is my email automatically mobile-responsive?
Yes. All emails created in the New Email Builder [Beta] are mobile-responsive by default. Use the device preview icons in the toolbar to check how your email looks on different screen sizes before sending.
What if I don't see the New Email Builder in my navigation?
Access to the new builder is currently limited, but will eventually be available for all users. Early access to the new builder may be determined by your home office.
Does compliance work the same way?
Yes. Compliance submission for emails created in the new builder works the same as it does today in the Classic Email Builder.
Have feedback about the new email builder?
We are currently in the beta phase of our email builder and would appreciate your feedback to help us improve further. Please share your thoughts with us directly at andrew.product@fmgsuite.com