Some archive providers give you flexibility in how archives are displayed. MyRepChat lets you control what's sent and how it's formatted once it reaches your provider. Start from a default layout, customize it using merge tags, name it, and use it in your archive schedule.
How Do I Configure a Layout?
Most users can use a default layout as-is with no changes needed — simply select one from the dropdown in your schedule. Defaults aren't editable (their fields and Save button are grayed out), so they're always available as consistent examples to copy from.
- Default HTML Archive Layout: Archives per Contact per Account, sent in HTML format — images are embedded directly into the message body where possible.
- Default Text Archive Layout: Archives per Period per Account, sent in plain text — MMS messages are attached separately and referenced in the message body.
To customize a layout, copy the default that's closest to what you want, rename it, and edit the fields using the merge tags below. Click Save, then select your new layout in your schedule and save that too. Use Test to send a sample message to your archiver.
What Are Layout Fields?
Layout fields control where different pieces of message data appear in your archive. Exact placement depends on your archive provider.
Layout Format:
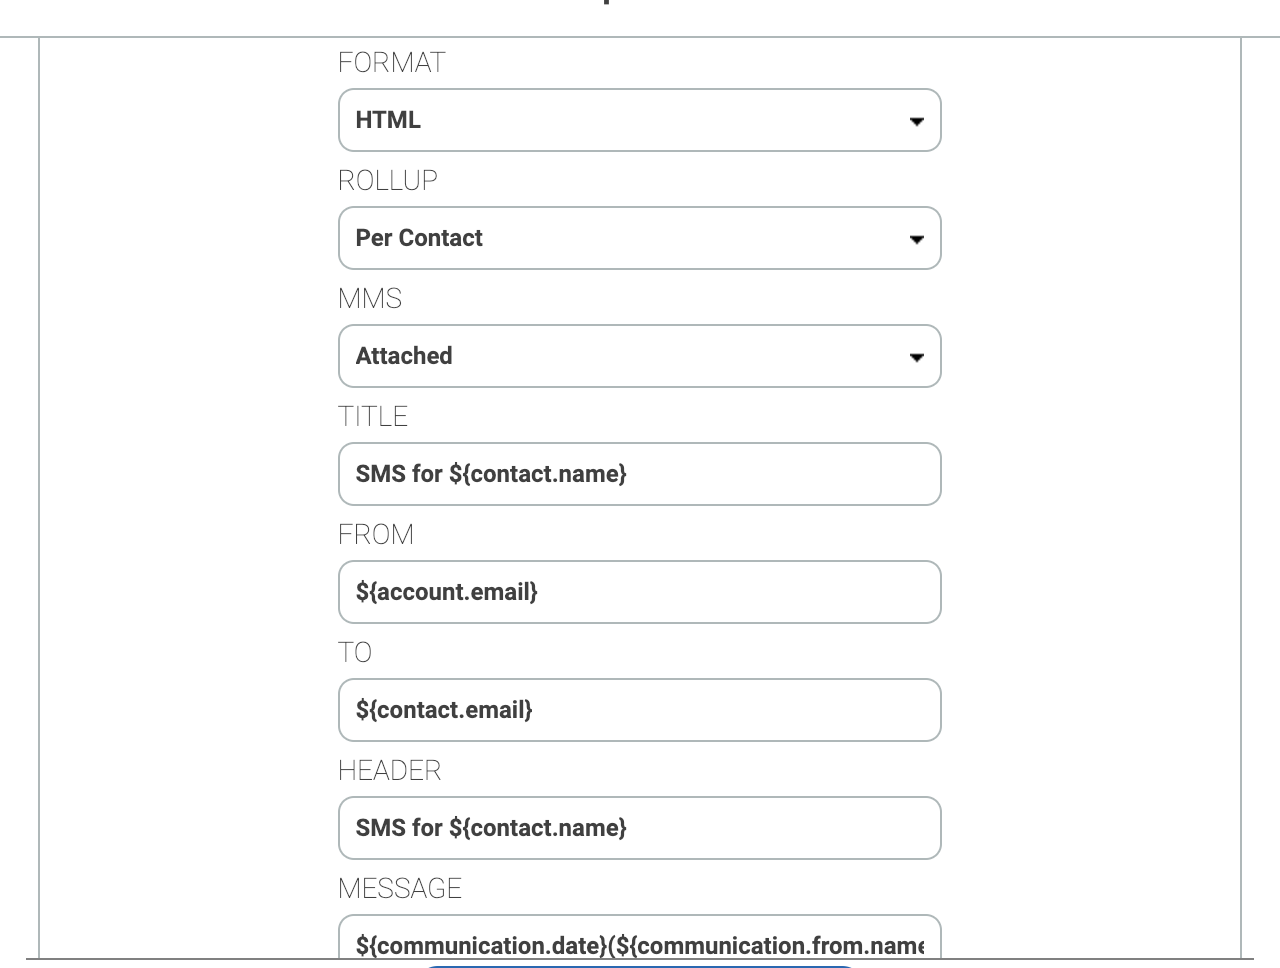
- Format: Text or HTML. HTML allows more control over how the archive displays.
- Rollup: What makes up each archive —
- Per Contact: Each Account/Contact conversation gets its own archive.
- Per Period: All conversations for the period are combined into one archive.
- MMS: How images, videos, or documents are handled —
- Attached: Files are attached to the archive. Providers that support attachment links will show content inline; others show a reference by name.
- Embedded: Media is embedded directly in the message.
- Linked: Only a link to the content appears — use this if you just need a temporary link before MyRepChat purges the content.
- Metadata: Only the file's name and size are sent — use this if you just need a record that an MMS was sent, without the content itself.
Layout Fields:
- Title: The heading for each archive. For email-based providers, this becomes the message subject.
- From: The conversation's "sender" — this can be the Contact, the Account, or whoever sent the first message, depending on your preference.
- To: Usually the opposite of From (if From is the Account, To is the Contact).
- Header: Appears before each conversation.
- Footer: Appears after each conversation ends.
- Message: What each individual message looks like.
What Are Merge Tags?
Merge tags let you insert specific data into your layout fields. For example, if an Account named "ACME Representatives" messages a Contact named "Bob Jones," you could set a header like:
- Conversation between ${account.name} and ${contact.name}
When we send the archive, this text will be replaced with:
- Conversation between ACME Representatives and Bob Jones
There are a TON of possible merge tags. Most you'll never use but are available just in case. Some of the most common tags are highlighted in blue:
Account Tags:
- ${account.name}
- ${account.email}
- ${account.contact}
- ${account.address}
- ${account.city}
- ${account.state}
- ${account.zip}
- ${account.phone} - the Accounts MyRepChat number
- ${account.user.name} - the User's name who sent the message for the Account
- ${account.user.email}- the User's email who sent the message for the Account
Contact Tags:
- ${contact.name} - the First and Last name of the Contact
- ${contact.email} - the contact email address (if there is no email address associated with the contact, we'll use <phonenumber>@journal.ionlake.com so email based archivers always have a 'Contact Email' address to reference.
- ${contact.firstname} - the first name of the contact
- ${contact.lastname} - the last name of the contact
- ${contact.address}
- ${contact.city}
- ${contact.state}
- ${contact.zip}
- ${contact.phone} - the messaging number of the contact.
- ${contact.sourceid} - the unique ID from the CRM for this contact
Communication Tags:
Communication tags are tags that relate to the conversation. The ${communication.to.*} and ${communication.from.*} tags will correspond to either ${account.*} or ${contact.*} tags depending on who initiated the conversation or message. If a ${communication.to.*} or ${communication.from.*} tag is used in a field that refers to the entire configuration or archive, it will refer to the first communication of the period. For example, putting ${communication.from.email} in the 'From' field will result in the email of who initiated the conversation during the period.
- ${report.range.start.date} - the start of the archive period range (defined by the Archive Schedule)
- ${report.range.end.date} - the end of the archive period range.
- ${report.range.start.datetime} - the start of the archive period range (defined by the Archive Schedule), including time
- ${report.range.start.datefull} - the ISO-8601 timestamp of the message.
- ${report.range.end.datetime} - the end of the archive period range, including time
- ${report.range.end.datefull} - the ISO-8601 timestamp of the message.
- ${communication.datetime} - the timestamp of the message.
- ${communication.datefull} - the ISO-8601 timestamp of the message.
- ${communication.time} - the time of the message
- ${communication.date} - the date of the message
- ${communication.datetime} - both date and time of the message
- ${communication.type} - the type of the message (call, sms, mms)
- ${communication.message} - the contents of the message
- ${communication.to.name}
- ${communication.to.email}
- ${communication.to.address}
- ${communication.to.city}
- ${communication.to.state}
- ${communication.to.zip}
- ${communication.to.phone}
- ${communication.from.name}
- ${communication.from.email}
- ${communication.from.address}
- ${communication.from.city}
- ${communication.from.state}
- ${communication.from.zip}
- ${communication.from.phone}
Assistant / "On Behalf Of" Tags:
Assistant tags relate to the user sending the message. The 'user' could be any login associated with the account. For 'communication' tags when its the contacts side of the conversation t will be replaced with the contact information. If the 'user' is the main account holder, it will not include 'on behalf of' or account information (to avoid duplicate information).
-
${account.user.name} - The logged in user name.
-
${account.user.email} - The logged in user's email
-
${account.user.name.email} - The logged in user's name and email.
-
${account.user.phone.email} - The logged in user's phone and email.
-
${account.user.name.behalf} - The logged in user's name followed by 'on behalf of' and then the account name. If the 'user' is the account itself it does include 'on behalf of'.
- ${account.user.name.behalf.contact} - The logged in user's name followed by 'on behalf of' and then the account contact person. If the 'user' is the account itself it does include 'on behalf of'.
-
${account.user.email.behalf} -The logged in user's email followed by 'on behalf of' and then the account name. If the 'user' is the account itself it does include 'on behalf of'.
-
${account.user.name.email.behalf} - The logged in user's name and email followed by 'on behalf of' and then the account name. If the 'user' is the account itself it does include 'on behalf of'.
-
${account.user.phone.email.behalf} - The logged in account phone and the logged in email followed by 'on behalf of' and then the account name. If the 'user' is the account itself it does include 'on behalf of'.
- ${communication.to.user.name} - contact name if inbound, otherwise the account contact name (first last)
- ${communication.to.user.email}- contact email if inbound, otherwise the account email from the account.
-
${communication.to.user.name.email} - If inbound message, the contact name/email, otherwise the account user's name and email.
-
${communication.to.user.phone.email} - If inbound message, the contact phone/email, otherwise the account phone and user email.
-
${communication.to.user.name.behalf} - If inbound message, the contact name, otherwise the account user's name followed by 'on behalf of' and then the account name. If the 'user' is the account itself it does include 'on behalf of'.
- ${communication.to.user.name.behalf.contact} - If inbound message, the contact name, otherwise the account user's name followed by 'on behalf of' and then the account contact person. If the 'user' is the account itself it does include 'on behalf of'.
-
${communication.to.user.email.behalf} - If inbound message, the contact name/email, otherwise the account user's email followed by 'on behalf of' and then the account name. If the 'user' is the account itself it does include 'on behalf of'.
-
${communication.to.user.name.email.behalf} - If inbound message, the contact name/email, otherwise the account user's name and email followed by 'on behalf of' and then the account name. If the 'user' is the account itself it does include 'on behalf of'.
-
${communication.to.user.phone.email.behalf} - If inbound message, the contact phone/email, otherwise the account phone and user email followed by 'on behalf of' and then the account name. If the 'user' is the account itself it does include 'on behalf of'.
- ${communication.from.user.name} - contact name if outbound, otherwise the account contact name (first last)
- ${communication.from.user.email}- contact email if outbound, otherwise the account email from the account.
-
${communication.from.user.name.email} - If outbound message, the contact name/email, otherwise the account user's name and email.
-
${communication.from.user.phone.email} - If outbound message, the contact phone/email, otherwise the account phone and user email.
-
${communication.from.user.name.behalf} - If outbound message, the contact name, otherwise the account user's name followed by 'on behalf of' and then the account name. If the 'user' is the account itself it does include 'on behalf of'.
- ${communication.from.user.name.behalf.contact} - If outbound message, the contact name, otherwise the account user's name followed by 'on behalf of' and then the account contact person. If the 'user' is the account itself it does include 'on behalf of'.
-
${communication.from.user.email.behalf} - If outbound message, the contact name/email, otherwise the account user's email followed by 'on behalf of' and then the account name. If the 'user' is the account itself it does include 'on behalf of'.
-
${communication.from.user.name.email.behalf} - If outbound message, the contact name/email, otherwise the account user's name and email followed by 'on behalf of' and then the account name. If the 'user' is the account itself it does include 'on behalf of'.
-
${communication.from.user.phone.email.behalf} - If outbound message, the contact phone/email, otherwise the account phone and user email followed by 'on behalf of' and then the account name. If the 'user' is the account itself it does include 'on behalf of'.
How Do I Test My Layout?
Since every provider behaves differently, test your layout before sending live data. See How do I configure the schedule for when I send archives? for testing steps.
Examples
These examples use "Email" as the archive provider, but most layout fields can be customized for any provider. For a plain email provider, the "To" address is set by your email integration, not the layout field.
Name-Based Title/Header, Account Email in "From"
This layout uses names in the header and title, with "From" always set to the Account email. Images are embedded, and each message shows the date, sender, and message content.
The configuration:
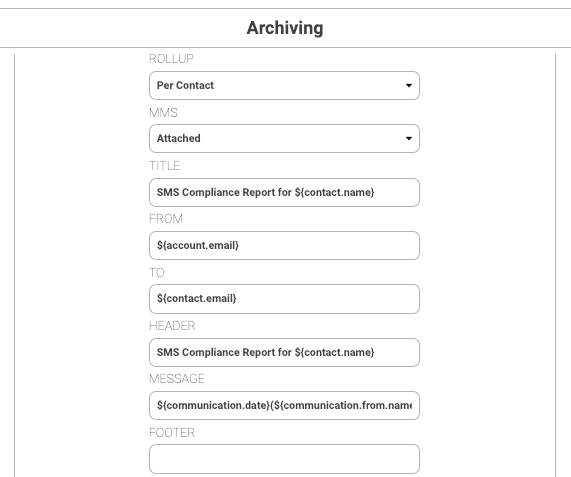
The resulting email is: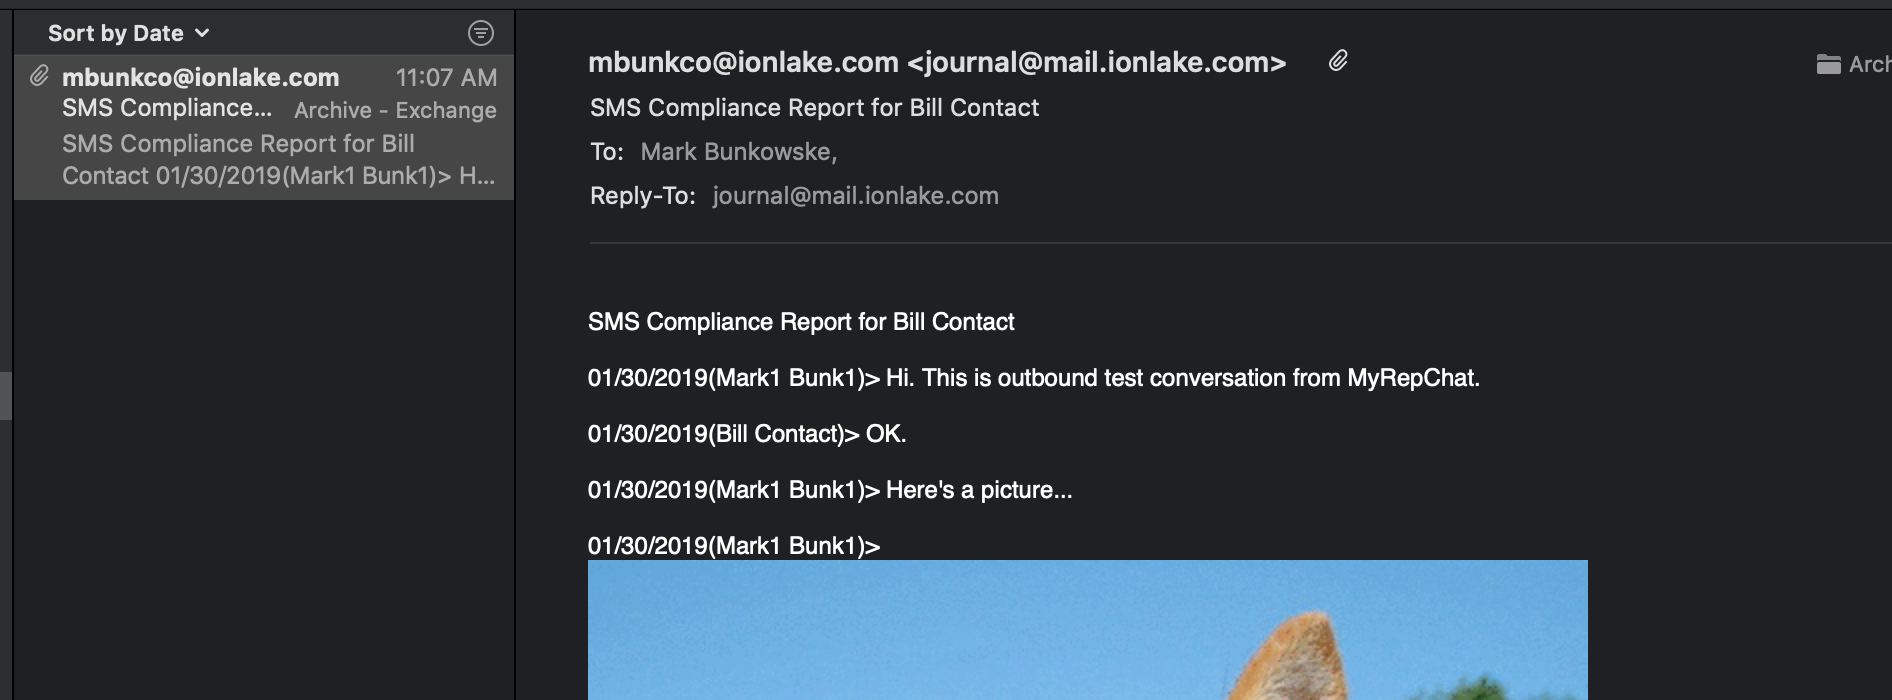
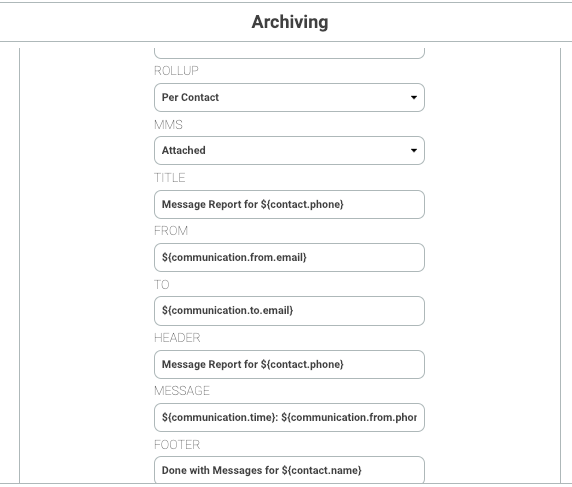
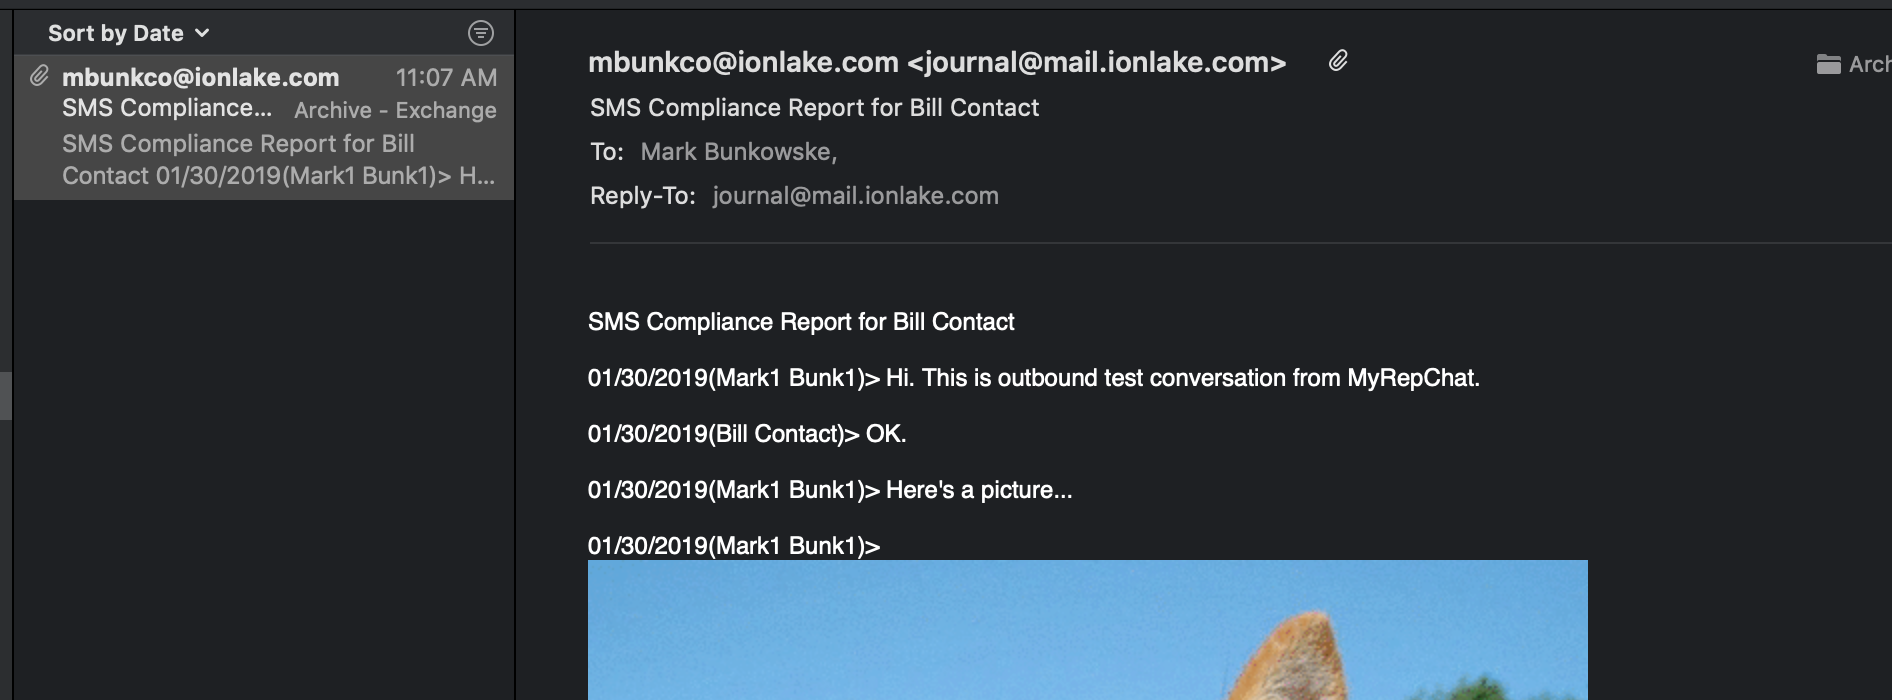
Name-Based Messages With Phone Number Title/Header, Initiating Email in "From"
This layout shows phone numbers in the title and header, but names within individual messages. "From" reflects the email of whoever initiated the conversation. Since the schedule runs daily, only time (not full date) is shown per message.
The configuration:
The resulting email (it would look similar in your email-based provider):
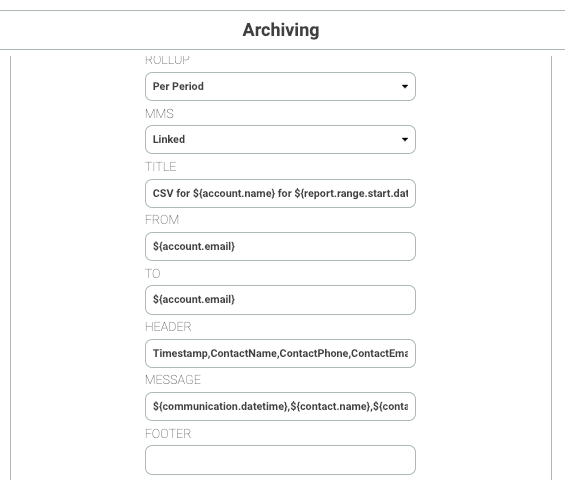
CSV-Style Format
While not sent as an actual CSV file, a layout can be built to send raw data that's easy to import into a spreadsheet.
The configuration:
The resulting email:
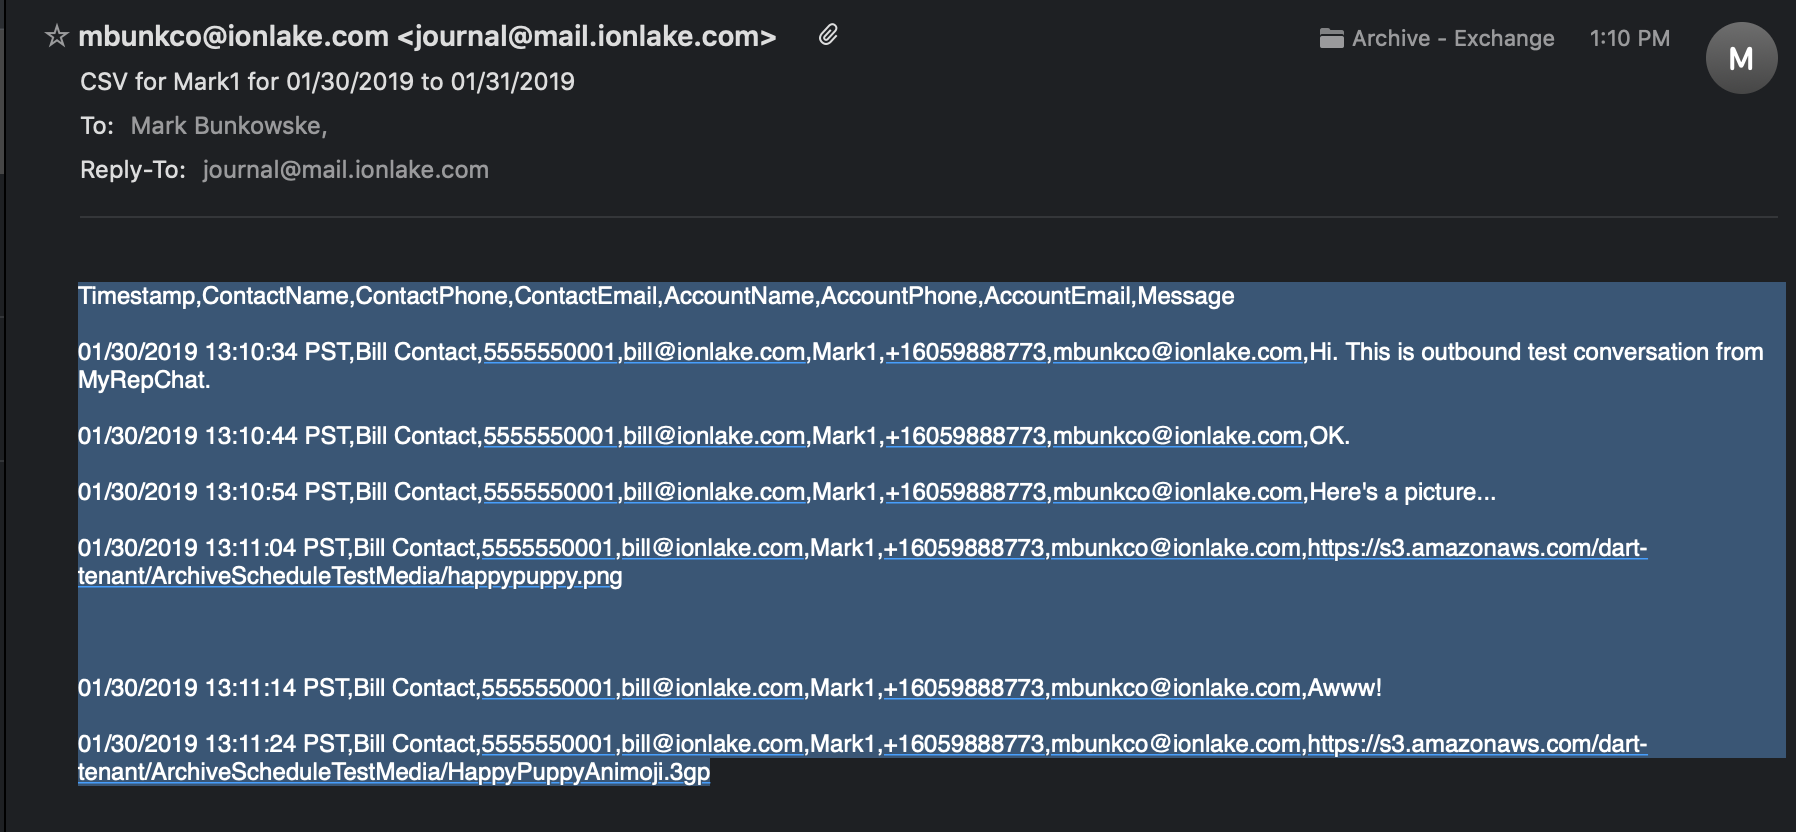
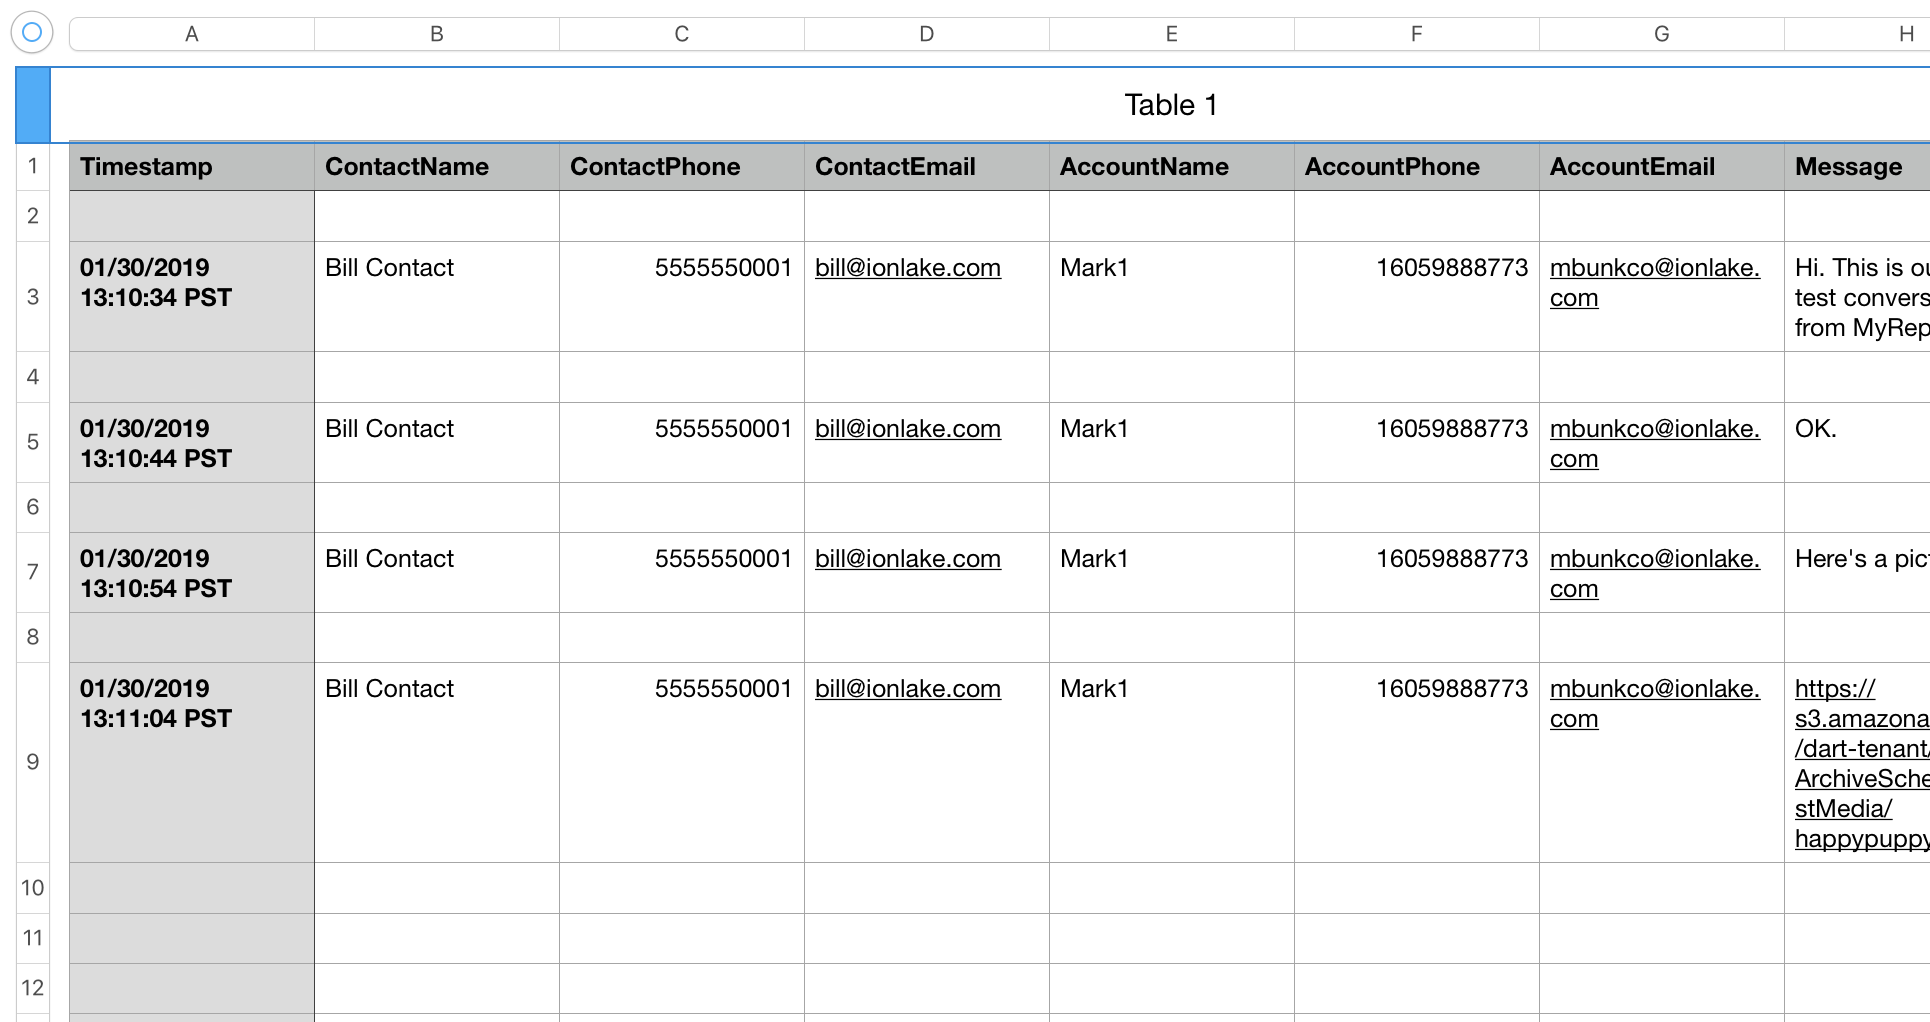
Which you can copy and paste directly into a spreadsheet: